
Hi all, for my blog update this week I'd like to share a few tips and tricks I've learnt over the last few years which have helped me simplify and save time when creating my layouts.
By now you probably know I love using brads and the quickest and easiest way to make holes for the brad is to use a push pin and push pad or soft craft mat. Just position the pad under your layout where you are going to make the hole and push the pin through the paper. EASY.

My second tip is attaching ribbon to your layout. Lay down your ribbon where you want on the layout, then remove it. Place a strip of double sided tape here along your page where your ribbon was, take off the backing and then re-lay your ribbon , this gives a very smooth finish, its important you put the double sided tape onto the page not the ribbon for a smooth result.


Do you ever have trouble sliding your layout into a page protector after you have finished ? To over come this, before you start your page take a 2 or 3 mm slice off one side of your background card stock, this will allow for easy insertion into the page protector.

This next tip will help you to make a smooth sanded edge on your photos or paper. Using a distressing tool such as this one from basic grey or this one from Kaiser and a craft mat, place your paper or photo right on the edge of the craft mat. Run the distressing tool down along the edge of the paper/photo. You must make sure that the paper /photo stays on the very edge of the mat for a smooth finish.

A quick way to attach buttons to your layout without the hassle of sewing them on is to use some embroidery thread. Simply thread it through the holes of the button, then tie a knot at the back.. and cut off the extra thread. Then attach the button to your layout with pop dots or a strong adhesive. Voila !


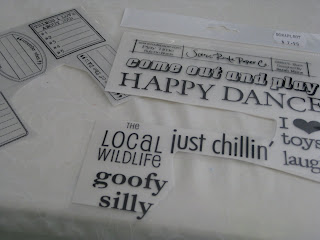
My final tip I learnt from Jennifer Ditz Mcguire a few years back when I attended a class with her. When it comes to using rub ons such as these from scenic route leave the packet closed and simply cut out the words or shapes you need through the plastic, this helps protect the unused portion of the rub ons.
I hope you can use some of these tips to help make your scrapbooking life a little bit easier.
Till next time
Kim
No comments:
Post a Comment